
Would you like to start a bullet journal in 2021? It’s isn’t as complicated as it looks. Read our blog to find out how to set up yours.
Starting a Bullet Journal
Are you ready to organise your life? Tired to being all over the place? A Bullet Journal is the ultimate organisational tool. I used to have sticky notes everywhere, with things I needed to remember and notebooks with various scribbles, it was a mess! When I discovered what Bullet Journaling was, it changed my life.Why? Because suddenly I had an easy to follow system. In this blog I will show you how to start your own bullet journal and why, it is the only tool you will need to get organised in 2021. Are you ready?
What is a Bullet Journal?
Bullet Journaling became very popular in 2018/2019 but it is more than just a craze. It is a system that is customisable to your needs, it is easy to follow, simple and effective. Ryder Carroll created this analogue system because he wanted something that wouldn’t get in the way but would track the past, organise the present and plan for the future. You can find out more about Carroll on the Bullet Journal YouTube channel here.
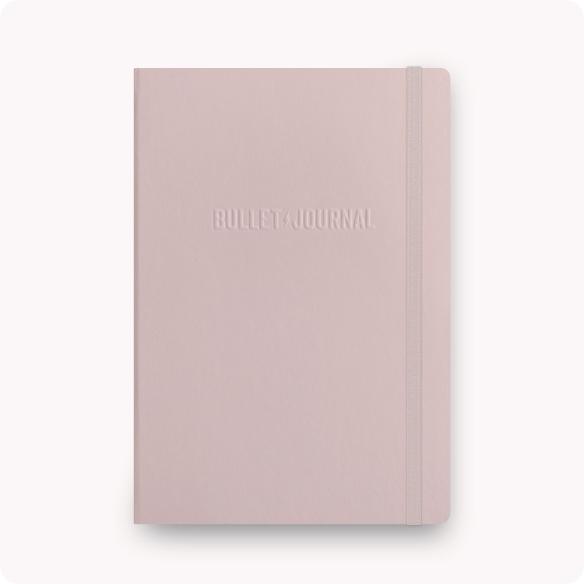
What you will need to start a Bullet Journal.
You will need:
- A pen
- A blank notebook
- A 6-Inch ruler
Pick your favourite pen. Keep it simple with a black or blue ink pen. You can decorate your pages later but it is best to start simply at the beginning. You can use any notebook to start a bullet journal however I would suggest one with dot’s and pre-numbered pages.
Here are some we love:
Bullet Journal have a classic range of journals. They are the only journals on the market created by Ryder Carroll making them easy to follow and use. Shop the Bullet Journal website here.
Papier have beautiful dotted journals. You can even customise the look of the journal, shop here.

Yop & Tom have a lovely range of dotted journals. Shop here.
Let’s Get Started.
Now that you have everything you need. Let’s get journaling!
Creating an Index
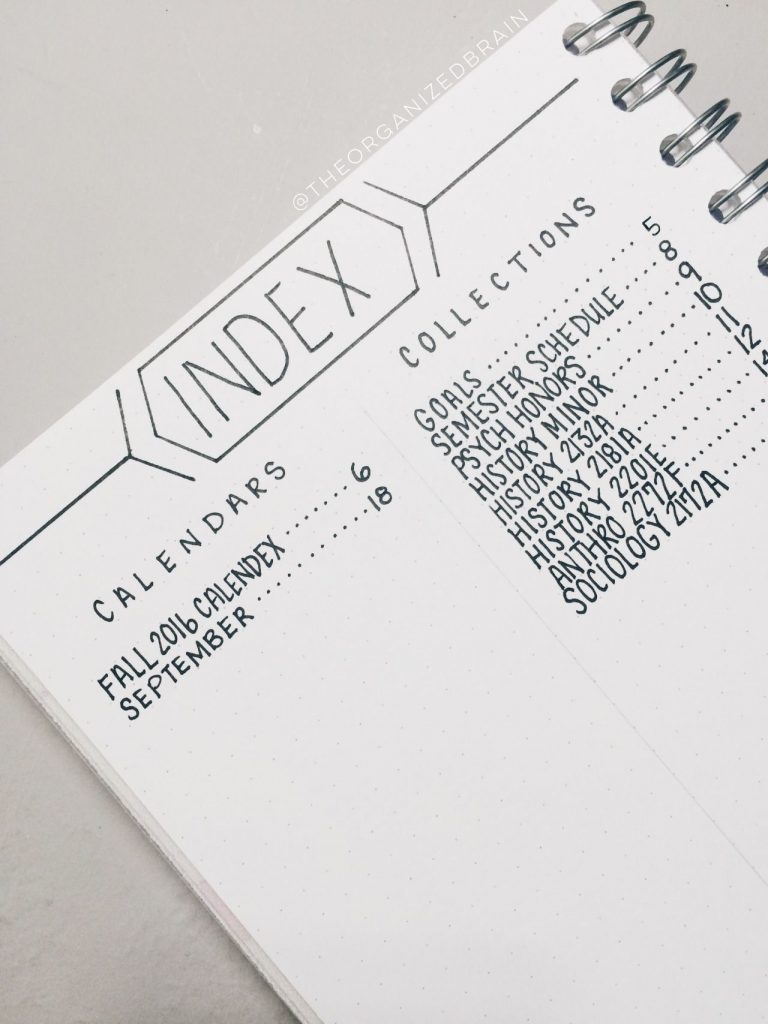
At the front of your Bullet Journal, create an index. The index is where you will keep track of everything that is in your journal and is why it is helpful if your pages are numbered. Title the top of the first two pages, index. Create two columns, on the left write page number and on the right, write page. As you create pages, you can add to your index with the page number and what is on the page.
Create a Key
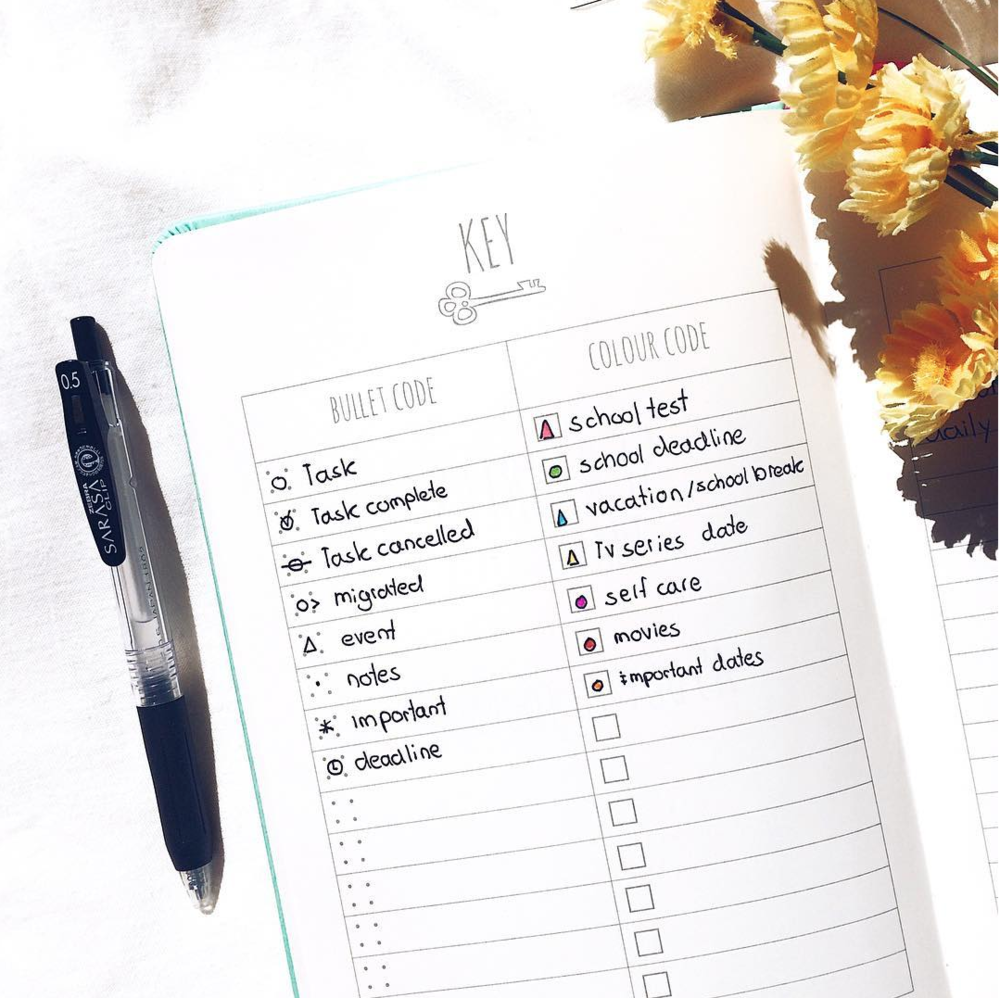
Create a key page which has all of the symbols used in a Bullet Journal and what they mean. That way if you do forget, you can flick back to check.
Create a Future Log
A future log is where you keep track of things that are happening in the future or tasks that you need to complete but not until a particular month.
- Count the number of lines on your page and divide by three.
- With a ruler draw a line across the spread.
- Title each box with a month.
- Add the future log page numbers to your index.
Your future log is now ready to be used!
Create a Monthly Log
Now we have to create a Monthly Log. Something you will do at the end of each month.
- Turn to the page over from your future log.
- On the page on the left, write your calendar for the month. Like everything in a bullet journal, keep it simple by writing the dates e.g 25 and the corresponding day, M (Monday).
- On the page on the right, start your monthly tasks list. These are big things you need to get done that month. Title the page with the month and use the task bullet to write the big things that you need to do.
- Add these pages to your index.
Create a Daily Log
Create a Daily Log
You will spend most of your time within your daily log.
- Write the date (0401) and the day (WED) and start rapid logging what you have to do that day.
- Add all of the pages to your index.
Some Bullet Journal Tips!
The point of bullet journaling is that it is a simple system so keep any words to a minimum. At the start of a month, fill in the dates and days for the whole month. Go through and add in any minor events e.g a meeting. Add in any tasks that have to be completed by a set day.
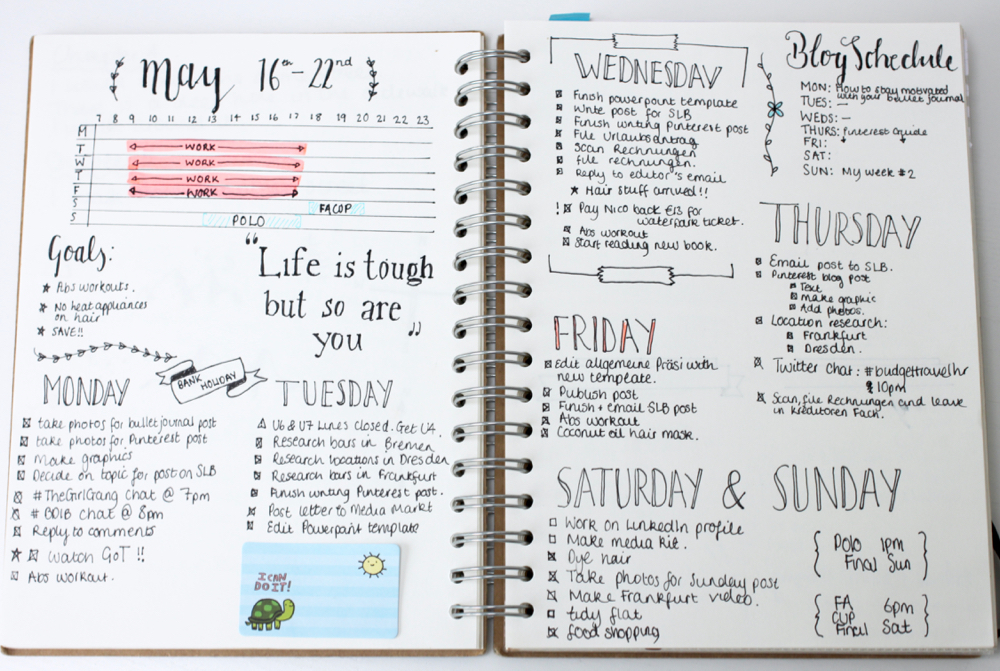
At the start of each week, I look ahead at my daily logs and start adding tasks in while always leaving space for tasks that arise daily. I try to only have 5 things I have to do that day so as not to overload myself.
End of Month Check-Up
- At the end of the month start to create the next month.
- Go through your past month and X out any tasks you have completed.
- Look at open tasks and ask yourself, ‘is this still worth my time?’
- If it is add an arrow facing right and copy the entry into the new monthly log.
- If it is still important but not for a few months, add an arrow facing left and add it to your future log. This is called ‘migration’.
- Try to be as ruthless as possible because this system is all about being productive and weeding out distractions.
Bonus Collection Pages
You can add in collection pages which are for notes. You can add all your notes into it so you have them in one place. For example if you were having a meeting and wanted to take some quick notes. Make a collection page, add short notes and index the page to review later.

Ready, Set, Go!
Like anything practise makes perfect and after a few months you will have a system in place. Make sure to play around and see what works for you.
Did you find this helpful? Please let us know in the comments below.
Happy Journaling, The Planner Addict.




Leave a Reply